
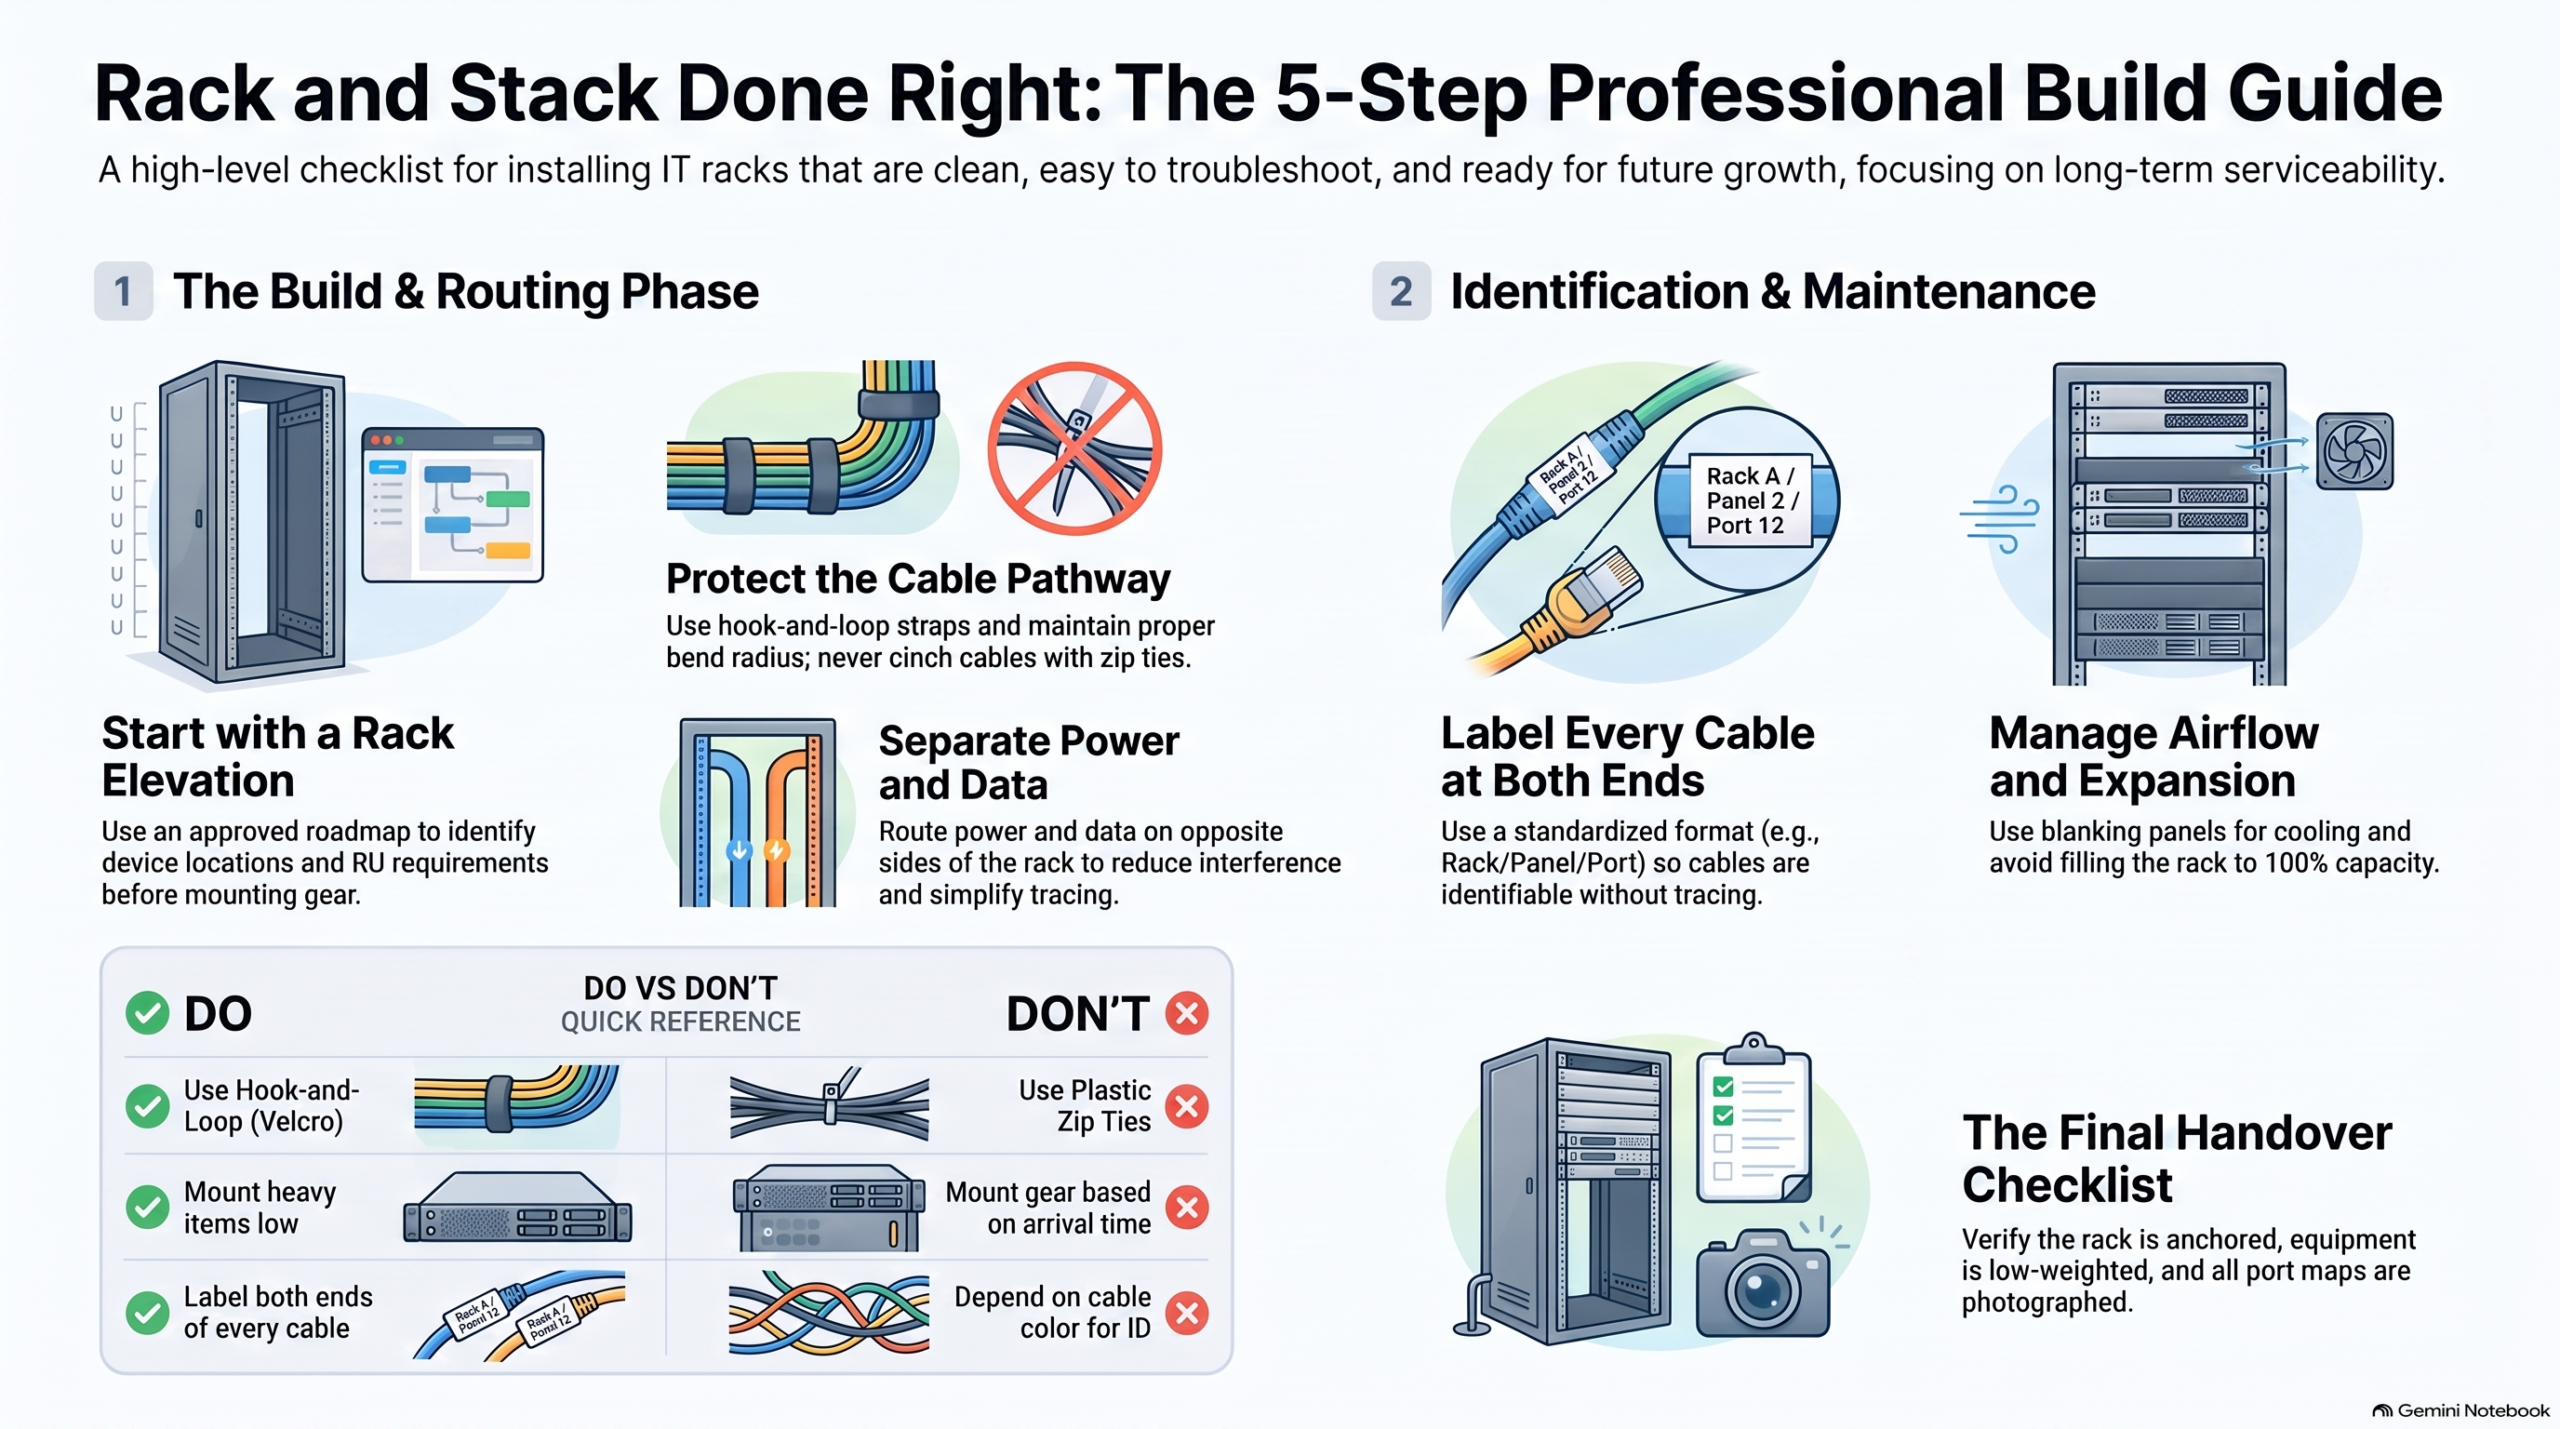
An organized IT rack may look impressive, but appearance is only part of the story. A professionally built rack should also be safe, clearly labeled, easy to service, and ready for future growth.
Cable management is not simply a finishing touch. It can affect network reliability, equipment performance, troubleshooting time, and the safety of the technicians working in the room.
The real test comes months or years after the installation. Can a technician quickly identify a connection during an outage? Can equipment be replaced without disturbing the rest of the rack? Is there enough room for new devices and cables?
Before calling an installation complete, ask these five questions.
1. Do We Have an Accurate Rack Elevation?
A rack elevation is a clear plan showing where every piece of equipment belongs. Without one, equipment may be installed wherever space happens to be available. That can lead to poor weight distribution, blocked ports, limited airflow, and difficult maintenance.
Before mounting equipment, confirm the following:
1. The rack size, depth, and available rack units
2. The location of switches, patch panels, power units, and battery backups
3. The space needed for airflow and service access
4. The entry points for cables, conduits, and overhead pathways
5. The amount of open space reserved for future equipment
The plan should also be checked at the actual site. Drawings do not always show every pipe, duct, column, or other obstruction that may affect the installation.
Heavy equipment, such as battery backups, should be installed near the bottom of the rack for stability. Patch panels and switches should remain easy to reach, and the front and rear of the rack should have enough clearance for maintenance.
2. Are the Cables Properly Supported and Protected?
Cables should never hang from their connection points. The weight of an unsupported bundle can place stress on ports and terminations, leading to damaged connections and intermittent network problems.
Vertical and horizontal cable managers help support the cables and keep pathways organized. They also make it easier to trace a cable and perform future changes without disturbing nearby connections.
Good cable management includes:
1. Using reusable hook and loop straps instead of tightly pulled plastic ties
2. Protecting the proper bend radius of copper and fiber cables
3. Choosing patch cords that are the correct length
4. Routing cable bundles along the sides of the rack
5. Keeping switch ports, equipment displays, and ventilation openings clear
Cable managers should not be packed to full capacity. Leaving room makes future additions easier and prevents cables from becoming crushed or difficult to trace.
3. Are Power and Data Cables Separated?
Power and data cables should follow separate pathways. Keeping them apart creates a cleaner installation, makes maintenance safer, and helps reduce the possibility of electrical interference.
A common approach is to route power on one side of the rack and data on the other. This gives technicians a clear view of both systems and makes it easier to identify the power source for each device.
Power cords should never be mixed into bundles containing copper, fiber, or control cables. Power distribution units and outlets should remain visible and accessible. When equipment has two power supplies, the connections should be clearly labeled so technicians can quickly identify each source.
4. Can Every Cable and Device Be Identified?
Clear labeling can save valuable time during an outage. Every cable should have a permanent printed label at both ends. The label should show where the cable begins and where it connects.
Relying only on cable colors is not enough. Colors can be reused, changed, or misunderstood. A consistent naming system gives every technician the same information, even if they were not involved in the original installation.
Labels should be added as the cables are installed. Waiting until the end of the project increases the chance of errors or missing information.
The final project records should include:
1. Updated rack elevations
2. Patch panel and switch port maps
3. Cable test results
4. Equipment and cable labels
5. Clear photos of the completed rack
Accurate documentation makes future repairs, upgrades, and troubleshooting much easier.
5. Will the Rack Stay Cool and Support Future Growth?
A rack can look organized and still have poor airflow. Large cable bundles can block equipment fans, trap heat, and contribute to premature hardware failure.
Cables should be routed away from air intakes and exhaust areas. Open rack spaces may also need blanking panels to help prevent hot air from circulating back through the equipment.
Future growth should be considered from the start. A well planned rack should have available space for additional equipment, patch panel connections, switch ports, power outlets, and cable management.
Planning ahead can prevent an expensive rebuild when the network expands.
A Simple Final Check
Before completing the project, confirm that:
1. The rack is secure, level, and accessible from the front and rear
2. Equipment follows an accurate rack elevation
3. Heavy equipment is mounted near the bottom
4. Power and data cables use separate pathways
5. Cables are properly supported and protected
6. Every cable is labeled at both ends
7. Airflow paths are clear
8. Space is available for future growth
9. All documentation and test results are complete
Build It for the Next Technician
A neat rack may look good on installation day. A professionally built rack continues to perform well for years.
Good planning and cable management help reduce troubleshooting time, prevent accidental disconnects, protect equipment, and make future upgrades easier. Most importantly, they give the next technician a safe and understandable system to work with.
If you are planning a new IT room, upgrading an existing rack, or looking for help organizing your infrastructure, Avisight is here to help. We design and install reliable low voltage and network infrastructure that is organized, documented, and built to support your business as it grows.
Contact Avisight to discuss your next project.